迁移博客框架后以前的 MMD Ray 渲流程没有备份,这次正好想重做一个 MMD,在制作过程中顺手记录 Ray shader 的 2D 渲染流程(细节地方较多,不注意很容易出错)。
Ok LET’S GOOOOO!!!修改 Ray 默认配置文件
Ray 渲默认不开启 2D 渲染功能,需要手动修改配置文件,开启轮廓线,2D Toon 等渲染选项。
以下是我的配置文件 ray.conf,根据自己电脑配置与需求自行选择即可,这里我想要好一些的光照效果和阴影效果,因此选了配置较高的贴图。
  1
  2
  3
  4
  5
  6
  7
  8
  9
 10
 11
 12
 13
 14
 15
 16
 17
 18
 19
 20
 21
 22
 23
 24
 25
 26
 27
 28
 29
 30
 31
 32
 33
 34
 35
 36
 37
 38
 39
 40
 41
 42
 43
 44
 45
 46
 47
 48
 49
 50
 51
 52
 53
 54
 55
 56
 57
 58
 59
 60
 61
 62
 63
 64
 65
 66
 67
 68
 69
 70
 71
 72
 73
 74
 75
 76
 77
 78
 79
 80
 81
 82
 83
 84
 85
 86
 87
 88
 89
 90
 91
 92
 93
 94
 95
 96
 97
 98
 99
100
101
102
103
104
105
106
107
108
109
110
111
112
113
114
115
116
117
118
119
120
121
122
123
124
125
126
127
128
129
130
131
| // Sun light
// 0 : None
// 1 : Enable
// 2 : Sun radiance calculated from solar zenith angle
#define SUN_LIGHT_ENABLE 2
// 0 : None
// 1 : Low ( 512 * 4)
// 2 : Medium (1024 * 4)
// 3 : High (2048 * 4)
// 4 : boom! (4096 * 4)
// 5 : boom!! (8192 * 4)
#define SUN_SHADOW_QUALITY 5
// Image Based Lighting
// 1 : Enable
// 2 : Enable + UV filp
#define IBL_QUALITY 1
// Fog Tab
// 0 : None
// 1 : Enable
#define FOG_ENABLE 1
// Light Tab
// 0 : None
// 1 : Enable
#define MULTI_LIGHT_ENABLE 1
// Outline Tab
// 0 : None
// 1 : Enable
// 2 : Enable + SMAA
// 3 : Enable + SSAA
#define OUTLINE_QUALITY 2
// Toon-shading material
// 0 : None
// 1 : Toon material support
// 2 : Toon material support with diffusion
#define TOON_ENABLE 1
// Screen Space Directional Occlusion
// 0 : None
// 1 : 8 samples
// 2 : 12 samples
// 3 : 16 samples
// 4 : 20 samples // https://www.slideshare.net/ozlael/mssao-presentation
// 5 : 24 samples
// 6 : 28 samples
#define SSDO_QUALITY 4
// Screen Space Reflection
// 0 : None
// 1 : 32 samples
// 2 : 64 samples
// 3 : 128 samples
#define SSR_QUALITY 2
// Screen Space Subsurface Scattering
// 0 : None
// 1 : Enable
#define SSSS_QUALITY 1
// Bokeh Depth Of Field
// MeasureMode can supports the following options:
// When MeasureMode at (0.00 ~ 0.24) : Test circle
// When MeasureMode at (0.25 ~ 0.49) : Test circle + Bone from ray.x
// When MeasureMode at (0.50 ~ 0.98) : FocalDistance Only
// When MeasureMode at (0.99 ~ 1.00) : FocalDistance + Bone from ray.x
// 0 : None
// 1 : Enable
#define BOKEH_QUALITY 0
// Eye Adaptation
// https://docs.unrealengine.com/latest/INT/Engine/Rendering/PostProcessEffects/AutomaticExposure/index.html
// 0 : None
// 1 : ISO 100 // Middle Gray at 12.7% // http://en.wikipedia.org/wiki/Film_speed
// 2 : ISO 100 // Middle Gray at 18.0%
#define HDR_EYE_ADAPTATION 0
// Bloom
// see this paper for 1st~5th HSV
// http://kalogirou.net/2006/05/20/how-to-do-good-bloom-for-hdr-rendering/
// 0 : None // compatibility with older versions:
// 1 : inf // 110 version before
// 2 : saturate // 110 version
// 3 : luminance & exposure // 120 version
// 4 : saturate & exposure // 130 ~ currently version
#define HDR_BLOOM_MODE 4
// Simple lensflare
// 0 : None
// 1 : Blue
// 2 : Orange
// 3 : Auto
#define HDR_FLARE_MODE 0
// Simple glare star
// 0 : None
// 1 : Anamorphic Lens Flares // blue
// 2 : Anamorphic Lens Flares // auto
// 3 : Glare star // orange
// 4 : Glare star // auto
#define HDR_STAR_MODE 0
// Tonemapping
// https://docs.unrealengine.com/latest/INT/Engine/Rendering/PostProcessEffects/ColorGrading/index.html
// 0 : Linear
// 1 : Reinhard // color keeping based on luminance
// 2 : Hable // white point at 4 http://filmicworlds.com/blog/filmic-tonemapping-operators/
// 3 : Uncharted2 // white point at 8
// 4 : Hejl2015 // https://twitter.com/jimhejl/status/633777619998130176
// 5 : ACES-sRGB // https://knarkowicz.wordpress.com/2016/01/06/aces-filmic-tone-mapping-curve
// 6 : NaughtyDog
#define HDR_TONEMAP_OPERATOR 6
// Anti-Aliasing
// 0 : None
// 1 : FXAA
// 2 : SMAAx1-medium // maybe, AMD graphics card does not support
// 3 : SMAAx1-high
// 4 : SMAAx2-medium
// 5 : SMAAx2-high
#define AA_QUALITY 5
// Postprocess Dispersion
// 0 : None
// 1 : Color Shift
// 2 : Chromatic Aberration // https://twitter.com/nnnnoby/status/818710634682585088
#define POST_DISPERSION_MODE 1
|
Ray 设置
MMD 显示设置
需要关闭 MMD 的抗锯齿,各向异性过滤,地面阴影。配置如下:
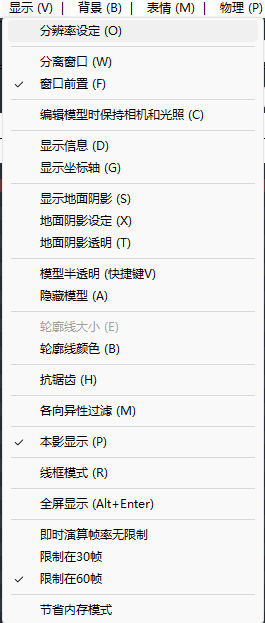 显示设置
显示设置
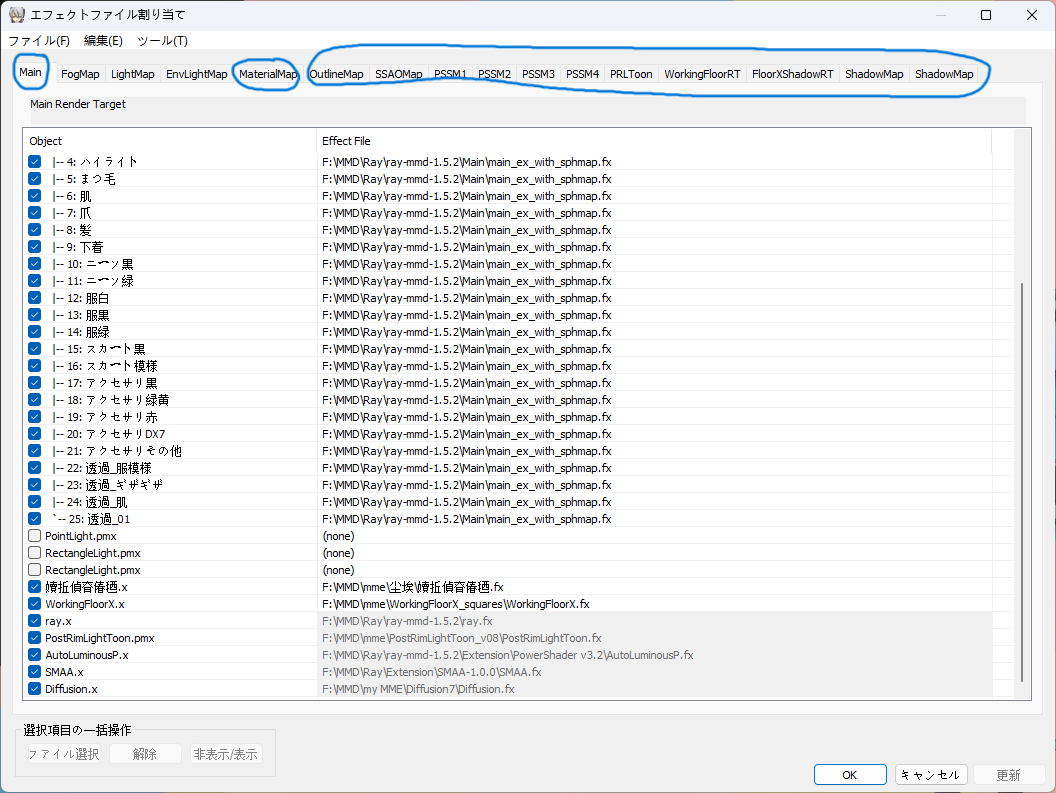
MME 控制栏
- Main 栏中为模型添加
main_ex_with_sphmap.fx (带高光贴图的效果) - EnvLightMap 栏位天空盒添加
Skybox\Sky Hemisphere\Sky with lighting.fx - 材质栏给模型添加 Ray Toon 专用材质(B 碗有许多开源的 Ray 渲材质)
- SSAO 栏可为眼睛材质选择 SSAO x 0.1,或者直接用 × 0 的 shader,眼睛渲染出来不会发黑。
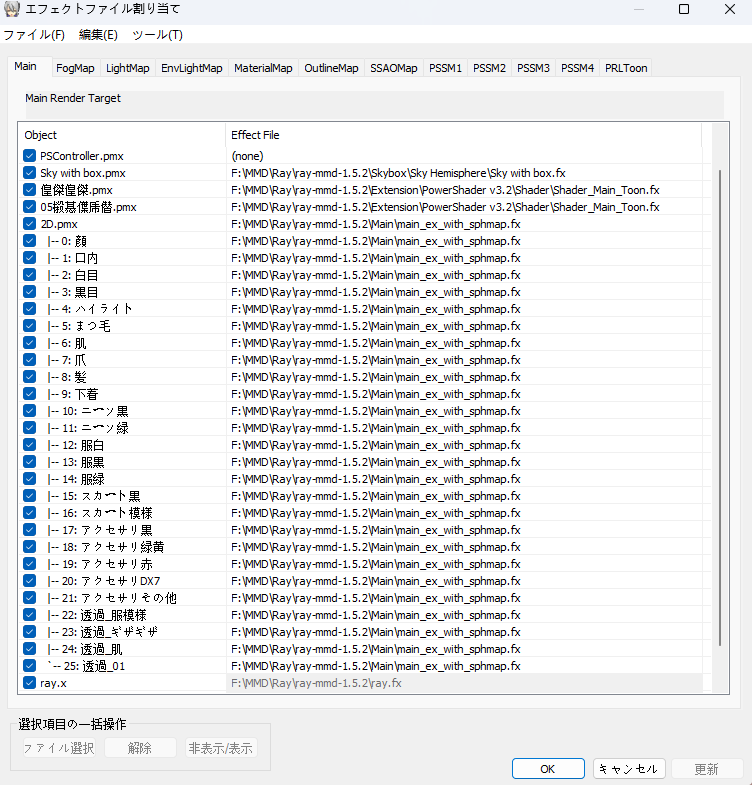 Main
Main
 材质栏
材质栏
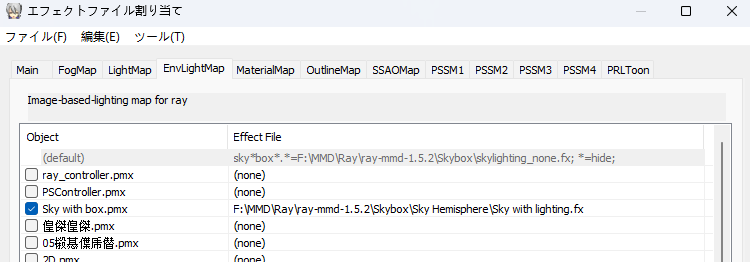 天空盒
天空盒
Ray 控制器
- SSAO:用于计算可视区域场景的几何物体之间的位置遮挡关系,要贴近 2D 渲染需要将该数值调到最低。
- 其他凭感觉调即可。
- 建议不要将全局光照调
SunLight 数值太高,还是自己打光调色效果较好。
 SSAO
SSAO
场景渲染
使用 PowerShader 渲染场景和 Ray 2D 一起使用的效果较好。
- 场景模型直接在 Main 栏里添加
PowerShader v3.2\Shader\Shader_Main_Toon.fx - MateriaMap 栏中把 Ray 的 shader 解除
- 将 PS 的控制器添加到 MMD
- 注意场景模型渲染顺序放在天空盒之后
完成以上步骤后并调节 Ray 控制器与天空盒控制器后的效果如下:
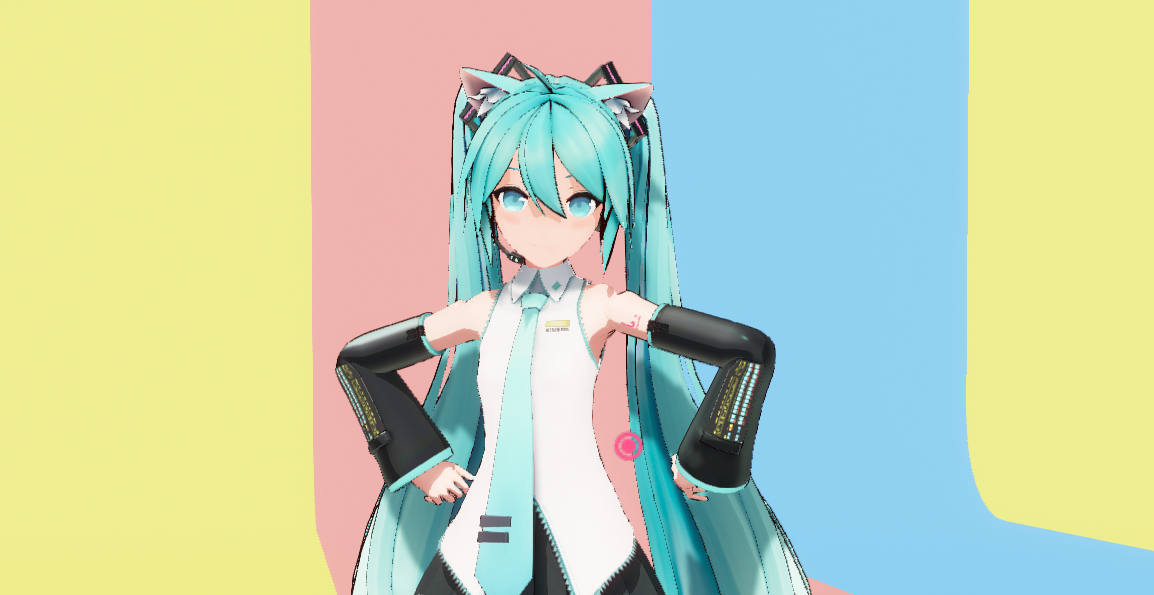 基础的Ray效果
打光
导入 Ray 自带光源,需要在 MME 面板关闭光源模型的渲染:main, materiaMap, PSSM 栏内关闭对该模型的渲染。
如下图所示,圈出的栏都需要取消勾选光源模型:
 关闭光源模型渲染
- 需要将控制器内的 range 调高后再调节颜色
- 在 MME lightmap 栏中添加光源的阴影 shader
- 若其他 MME 特效会显示光源模型,建议直接在 MME 中全取消勾选 Light 模型。
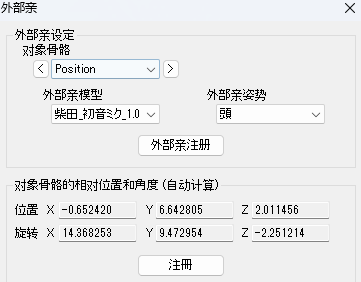
点光源可以绑定模型外部骨骼,如下所示:
 光源绑骨
光源绑骨
最终打光效果如下所示,添加了一个点光源与两个平面光:
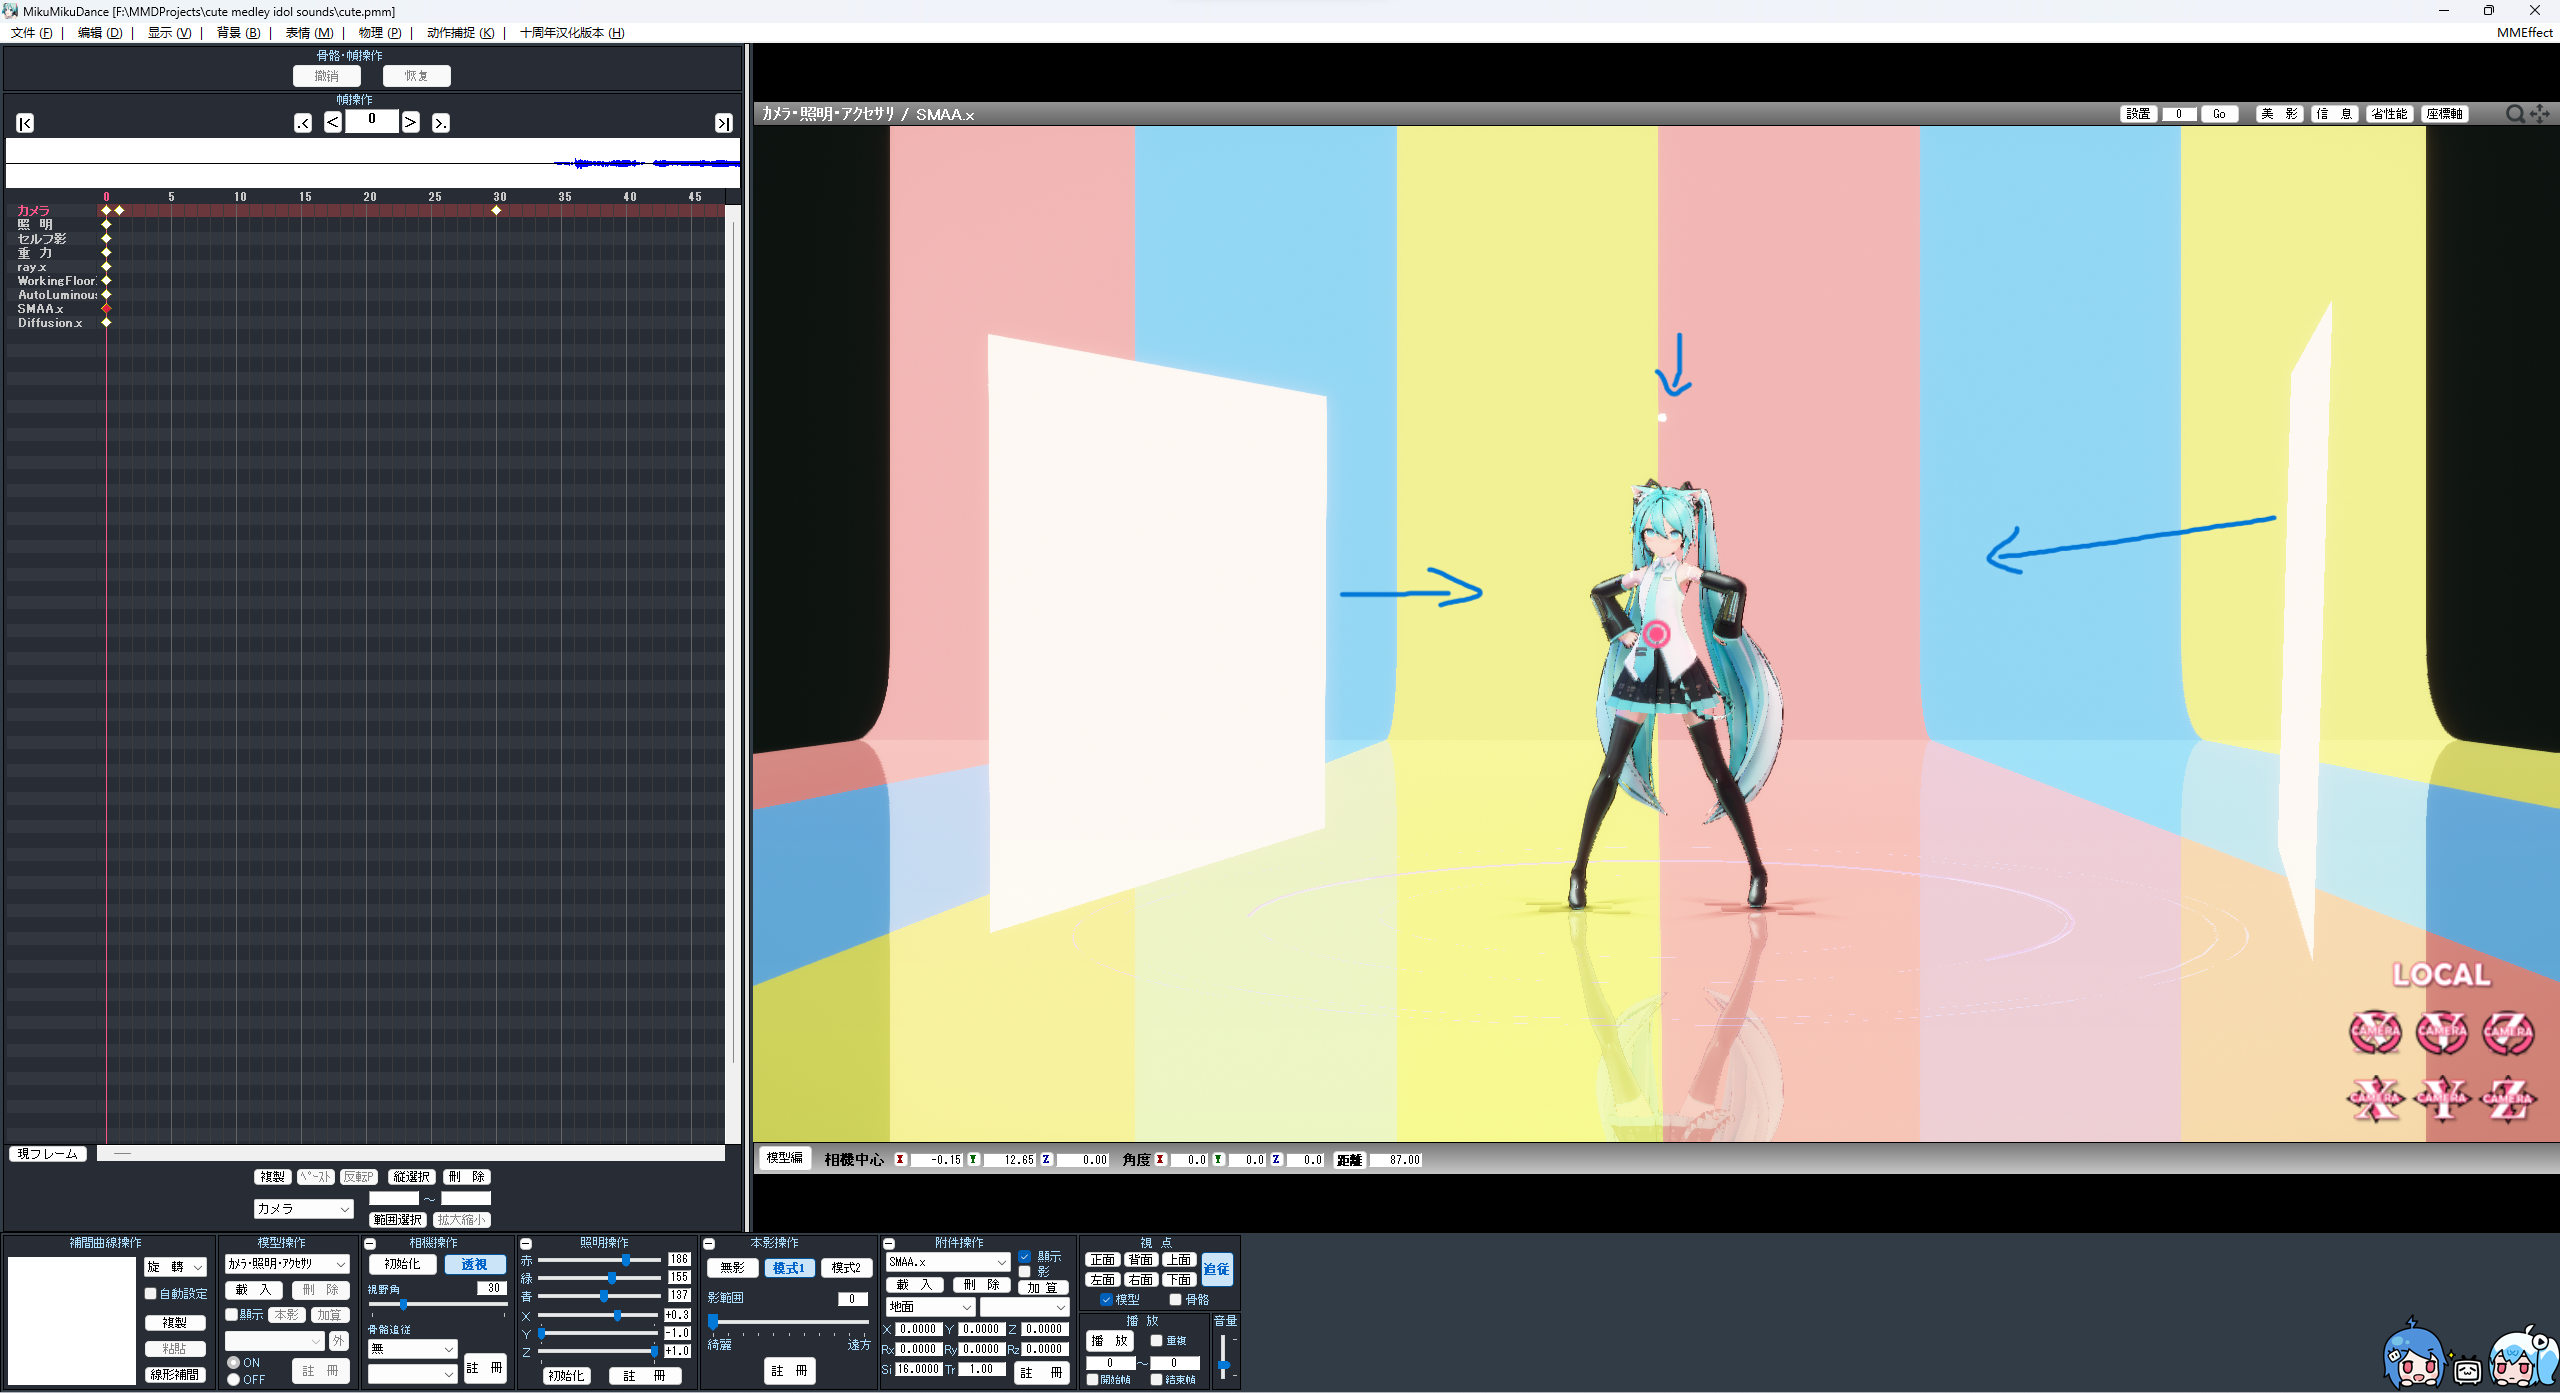 最终光源效果
模型与附件的描绘顺序
MMD 的绘制顺序类似图层,绘制顺序按照背景→场景→人物模型。
用 0-n 表示权重,0 权重最大在最上面,后面依次减小。
模型绘制顺序
- skybox
- 场景模型
- 人物模型
.x 附件顺序
- Ray,ES,ik,k3ls (权重设需为 1 )
- 雾、尘埃、水面 (若没有需要先于场景渲染的物体权重设为 0,若有则需要设定在物理渲染弹起与天空盒权重之后的数字)
- 其他的 MME (Line_V4 等需要绑定人物模型的效果)
- 自发光
- Dof,Bokeh
- 后处理 Diffusion,SelfBlend,SoftLightSB,LightBloom,ikcut···
以下是我本次制作的模型描绘顺序:
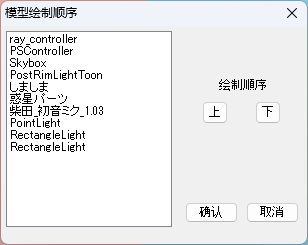 模型绘制顺序
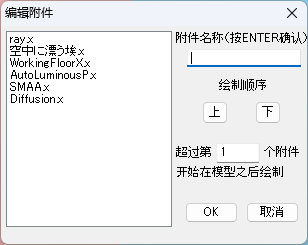 附件顺序
附件顺序
其他可选项
- PE 修改模型面部法线,将面部法线数量减少到 50%-80%,可以使模型脸部看起来更扁平化更偏 2D 风格(根据模型适当修改,有些模型原本就偏 2D 建模,法线减多了脸部光线变少会发黑)。
- 大部分 MME 的
.fx 文件可以直接修改一些常量配置。
输出
最终选择 4K 3840*2160 分辨率,60FPS 输出。文件大小能达到 400G 左右。
 输出的AVI文件
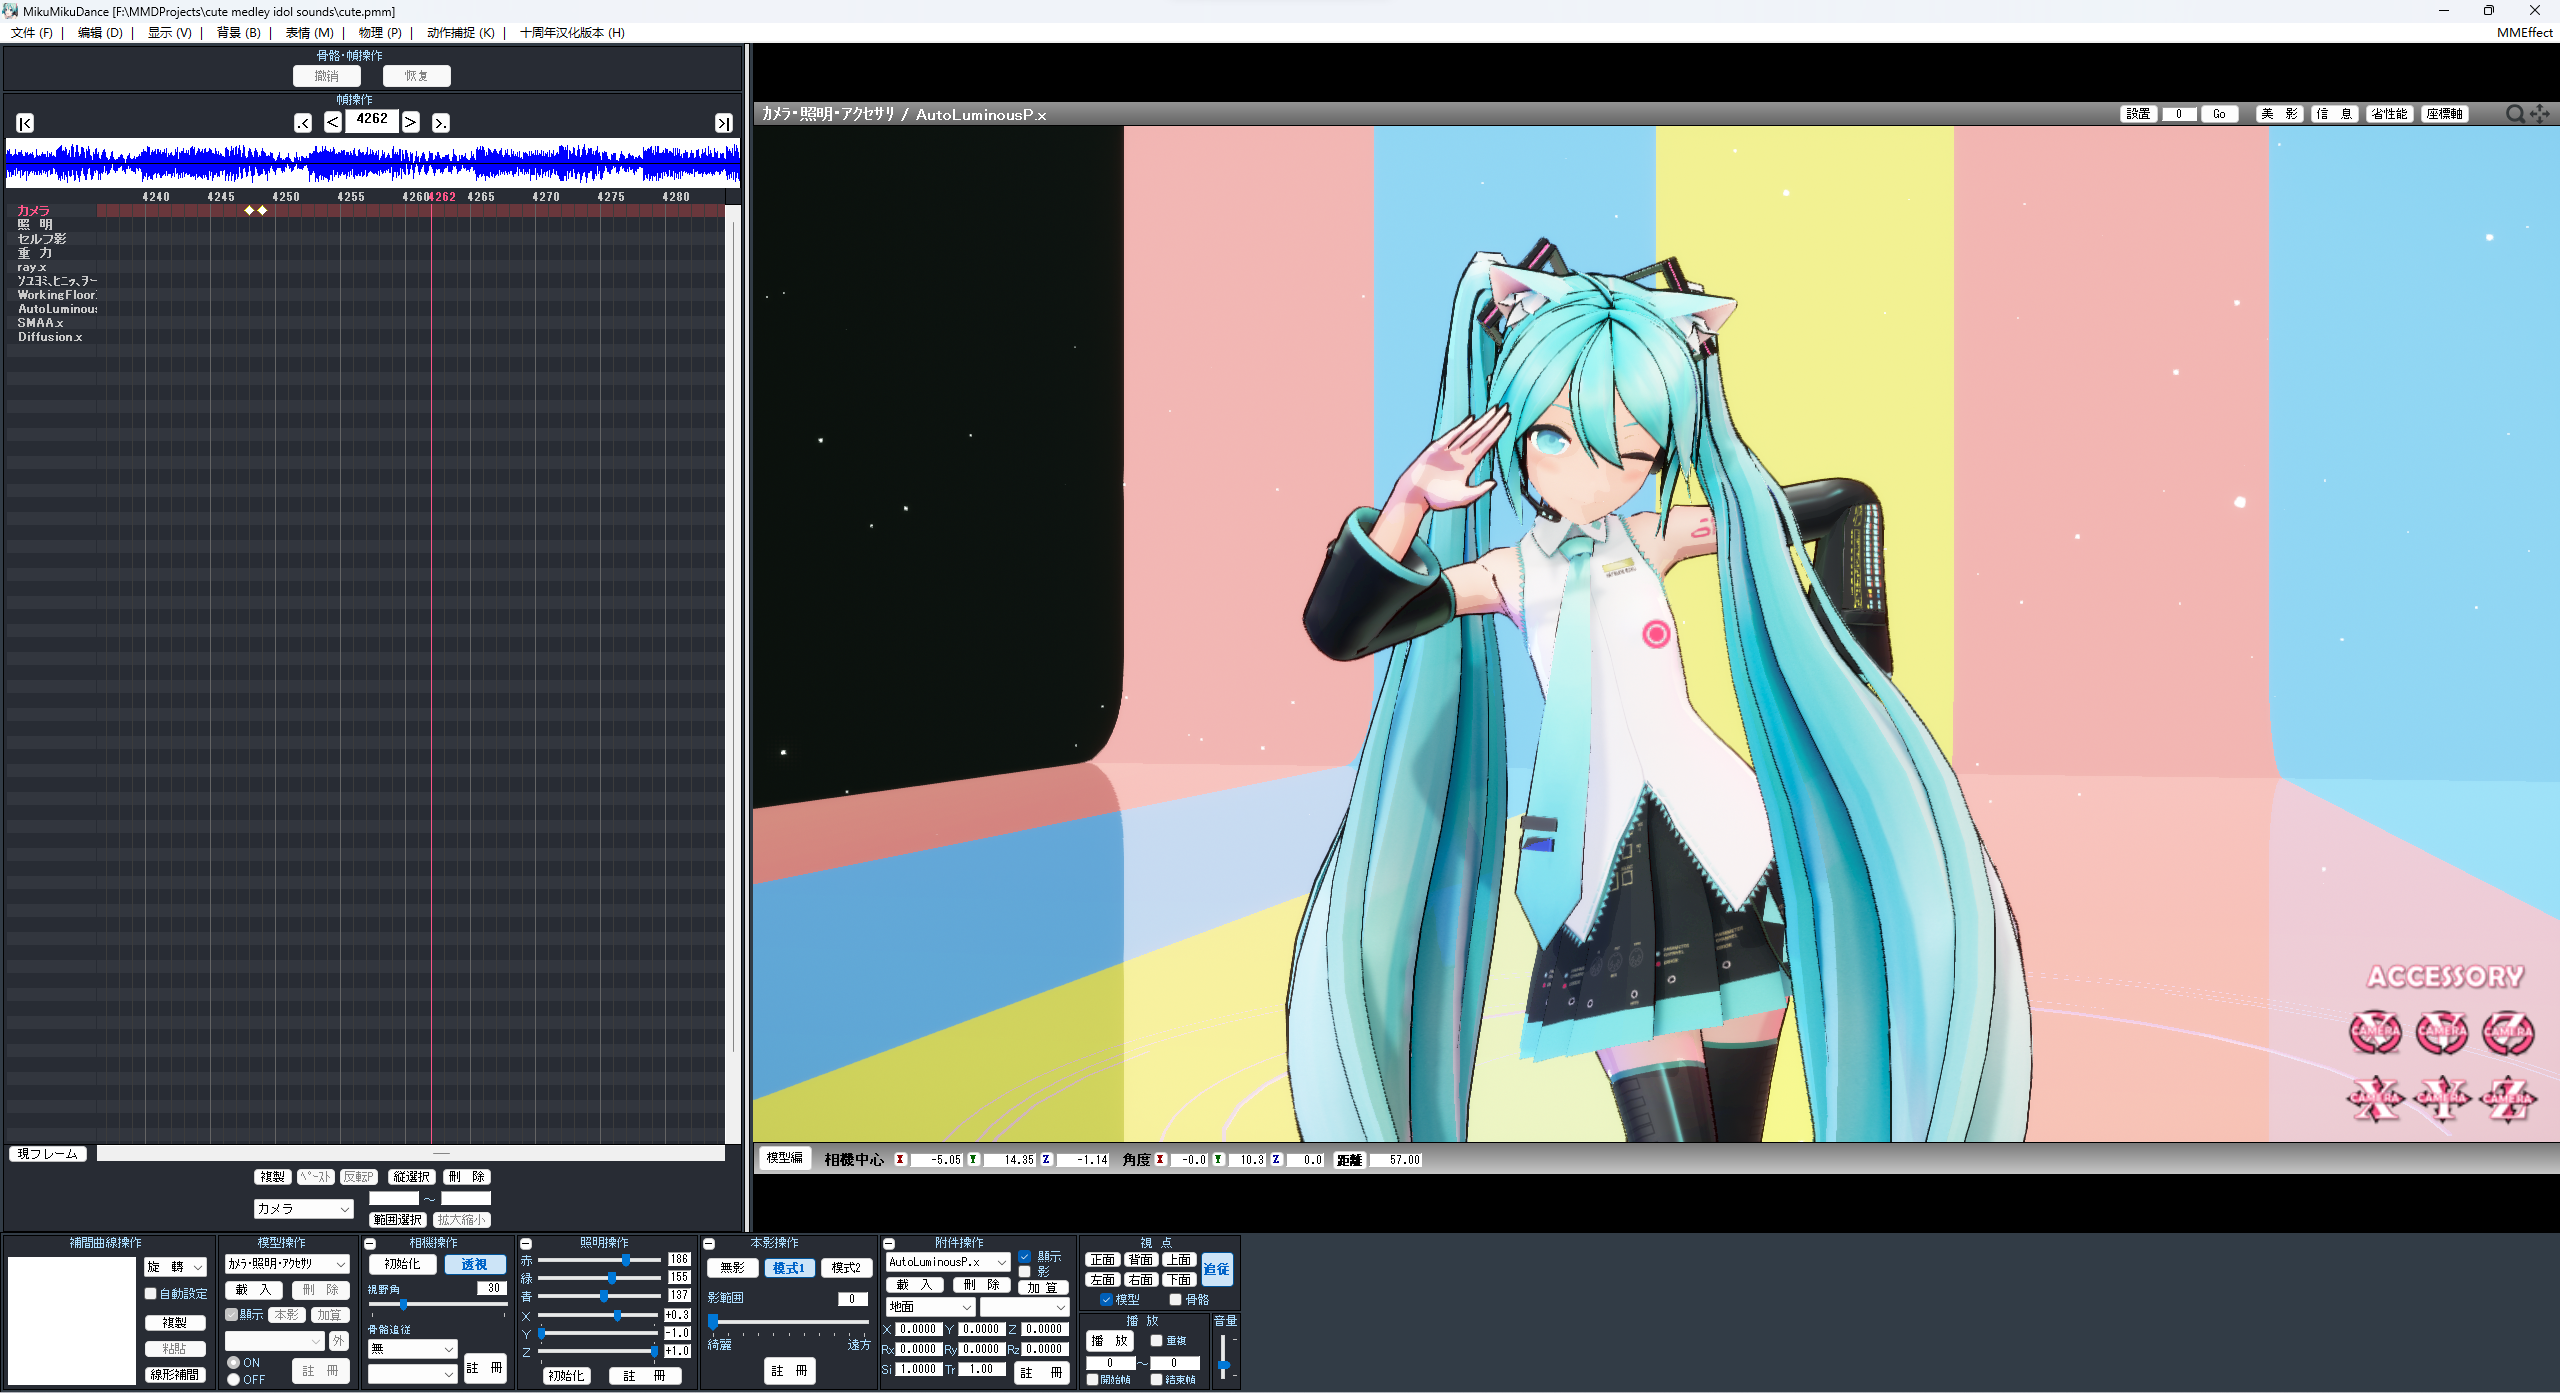 最终效果
最终效果
接下来就是到 PR 中调色压制加投稿的步骤了。(达芬奇没用过,据说调色效果更好)
 Niku
收录于 为爱发电的无用技能 !^w^!
Niku
收录于 为爱发电的无用技能 !^w^!


